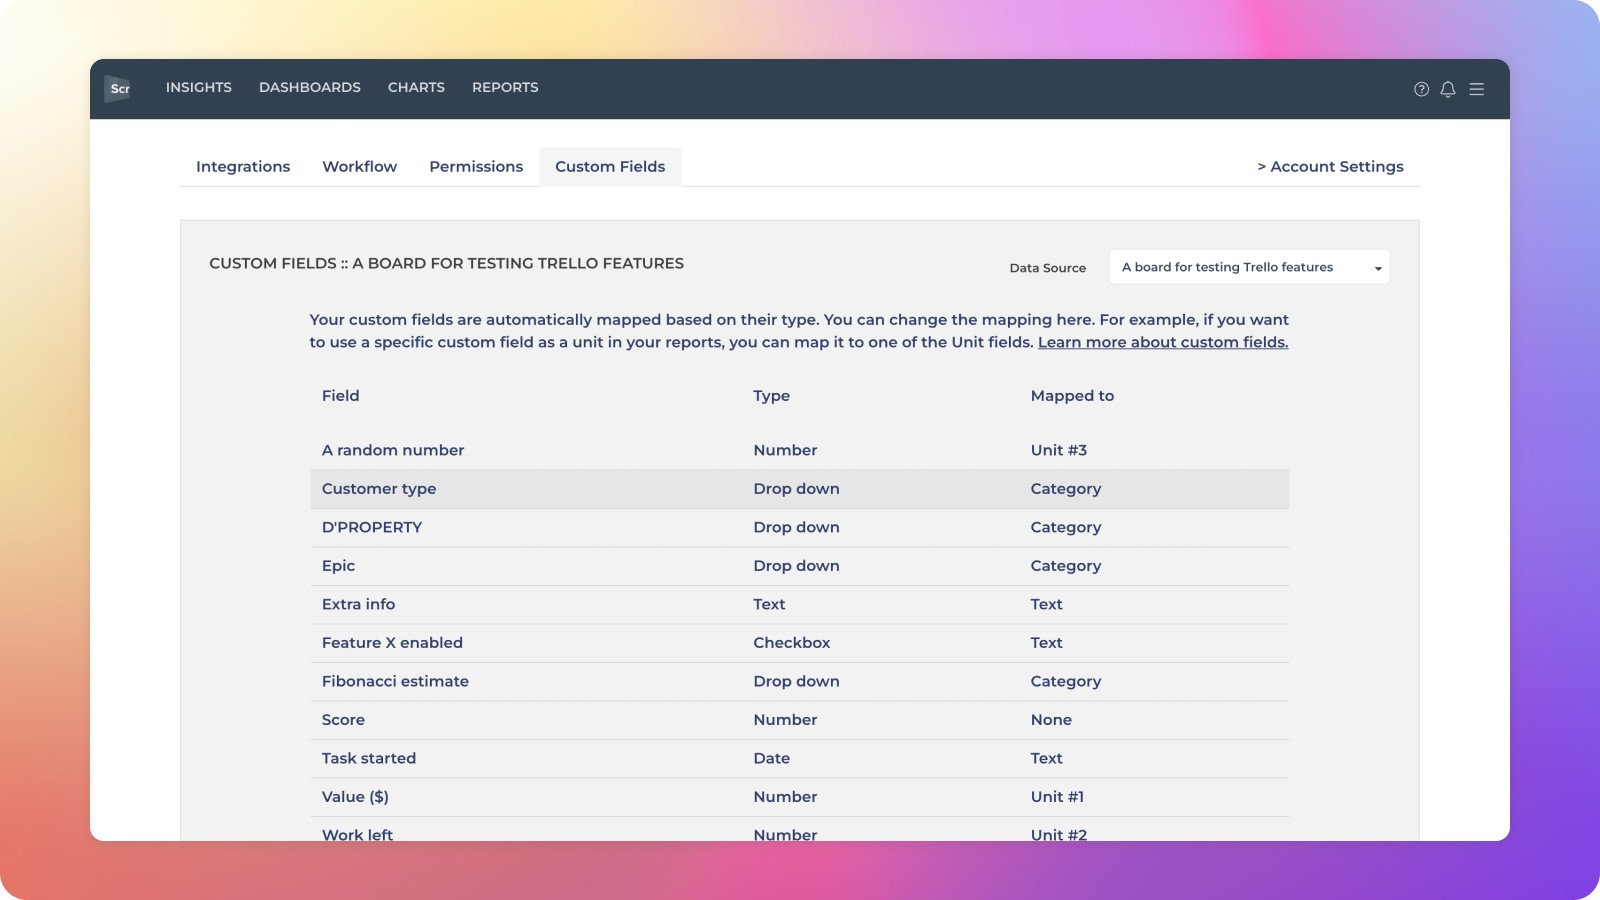
Viewing the default mapping
You can access the custom field mapping by selecting Data Mapping under the main menu, and navigating to the Custom Fields tab.
The rightmost column in the list shows how your custom fields are currently mapped. For example, numeric fields are mapped to a Unit, and dropdown fields are mapped to a Group & Filter. This mapping defines how you can use that field.
Unit fields can be used in counts (e.g. summaries and averages)
Group & Filter fields can be used for grouping and filtering the charts
Text fields can be displayed as columns in the Task list chart
Date fields can be used in filtering and as columns in the Task list chart
Mapping a drop down field to a number
Sometimes you may have a drop-down field that contains numeric values, and you'd like to use it as a unit rather than for grouping and filtering. In that case, you can change the mapping. Click the field to open it for editing:
Since this is a Dropdown field, it is mapped to Group & Filter by default. From the Map to the menu, select one of the Unit fields to make it available as a unit. If all unit fields are taken, you'll have to free one of the three unit fields before you can do this.
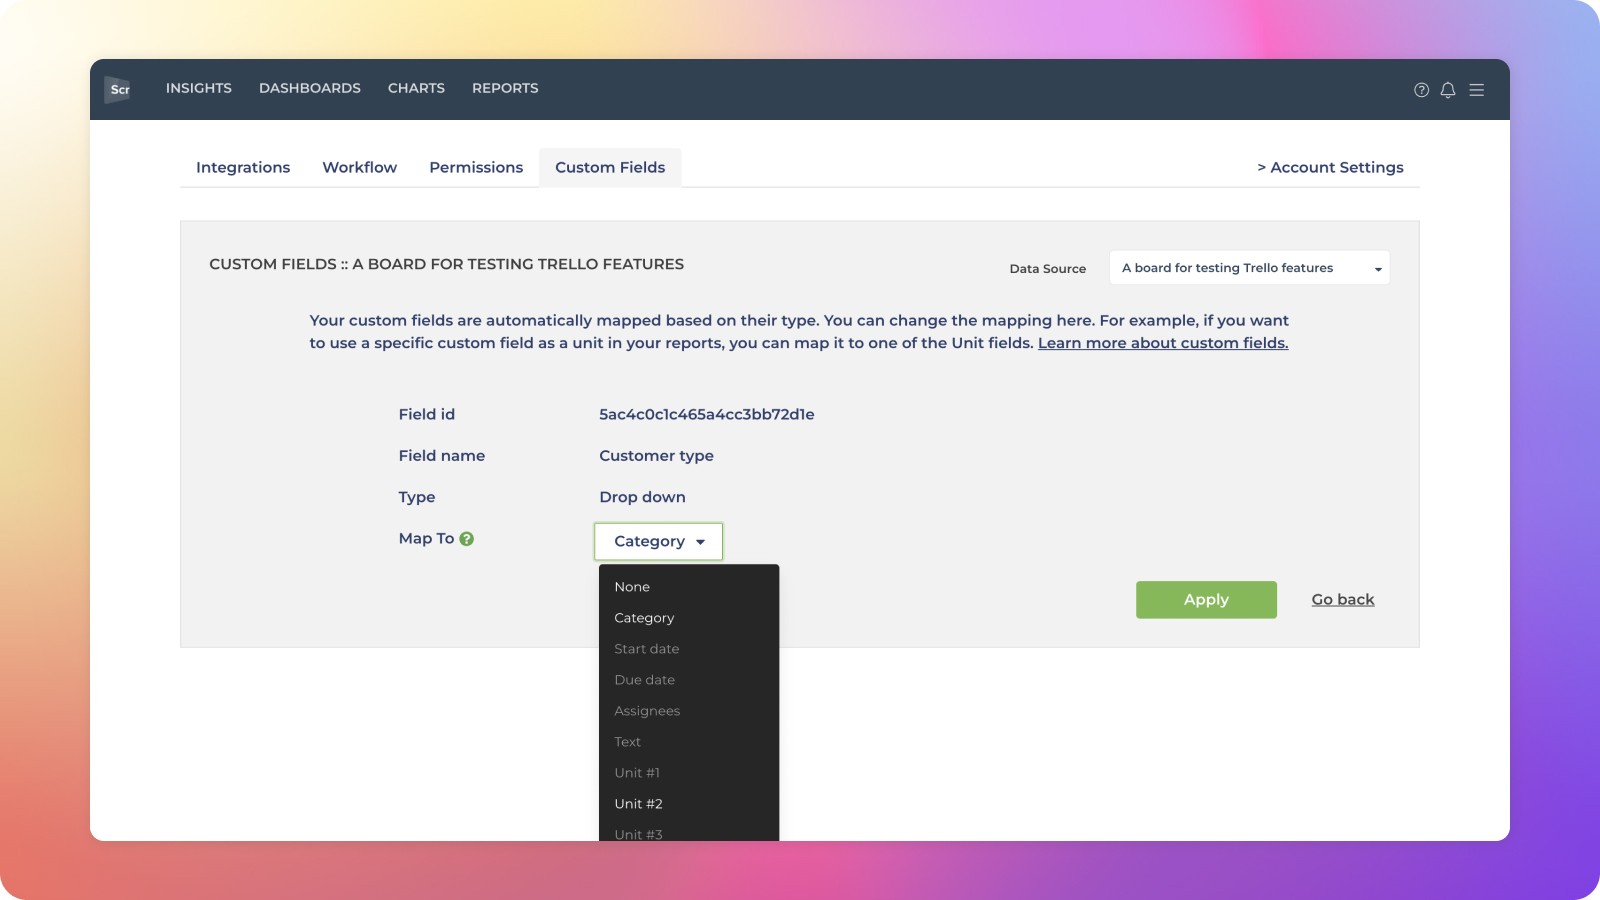
Once a drop-down field is mapped to a unit, it becomes available in the Unit menus throughout the product.
Grouping and filtering by a text field
You may also want to use your text fields for grouping and filtering. Similar to the drop down field, you can change the mapping in the Custom Fields settings:
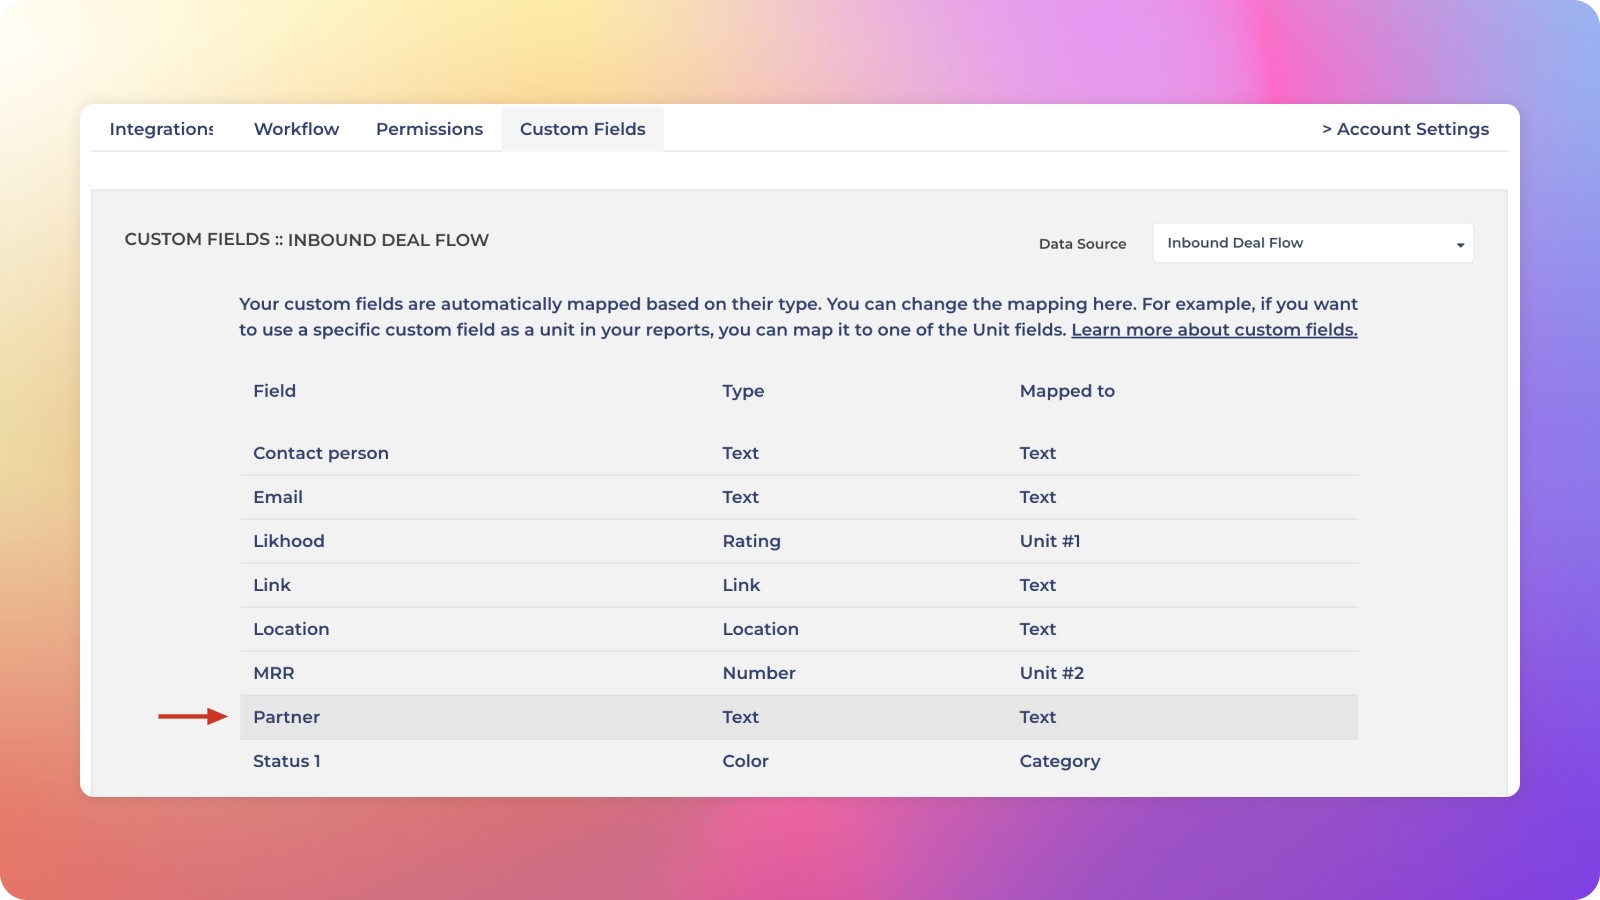
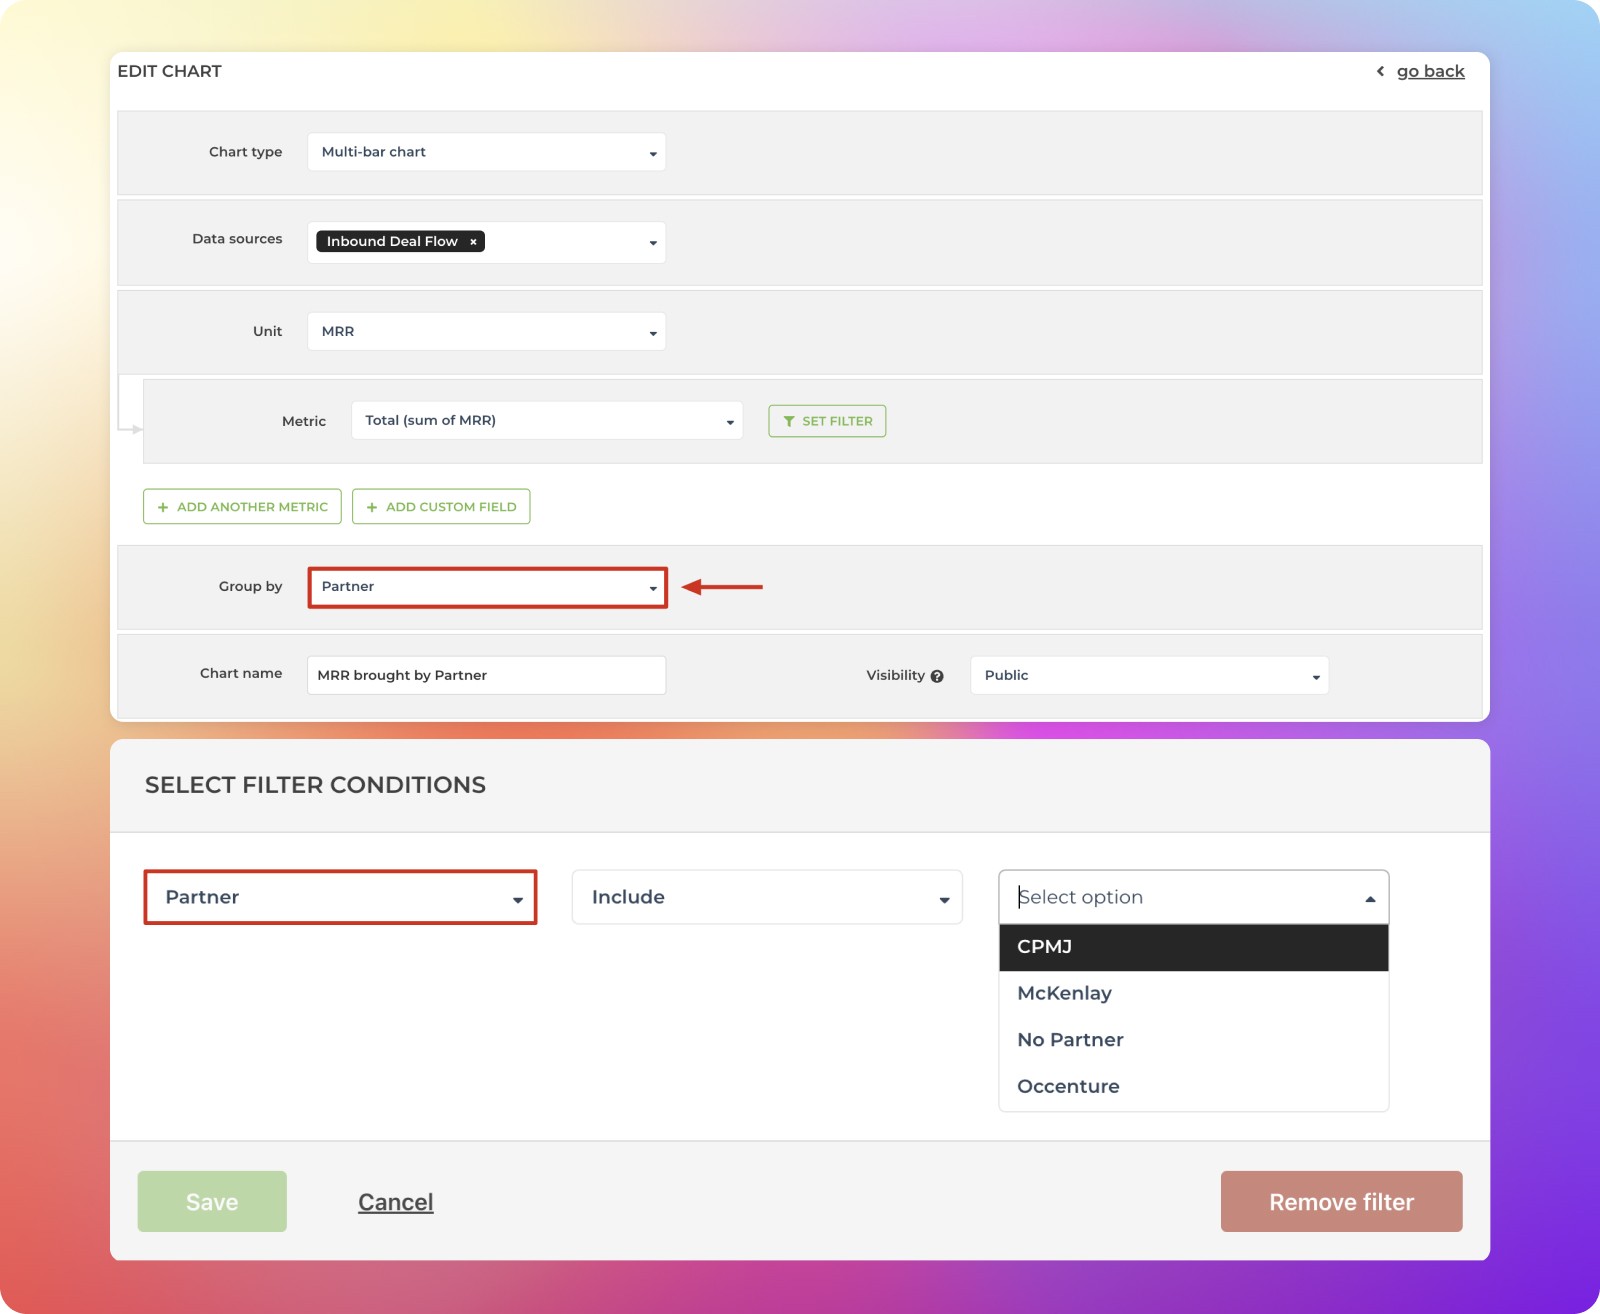
Text fields are mapped to Text by default. You can change its mapping by clicking the row. Once it is mapped as a Group & Filter, it can be used for grouping and filtering throughout Screenful:
Mapping a custom date field to a start or due date
The Workload (planned) chart uses start dates (optional) and due dates for calculating how much work is allocated for the future. You can configure any of your custom Date or Timeline fields to be either a start date or a due date.
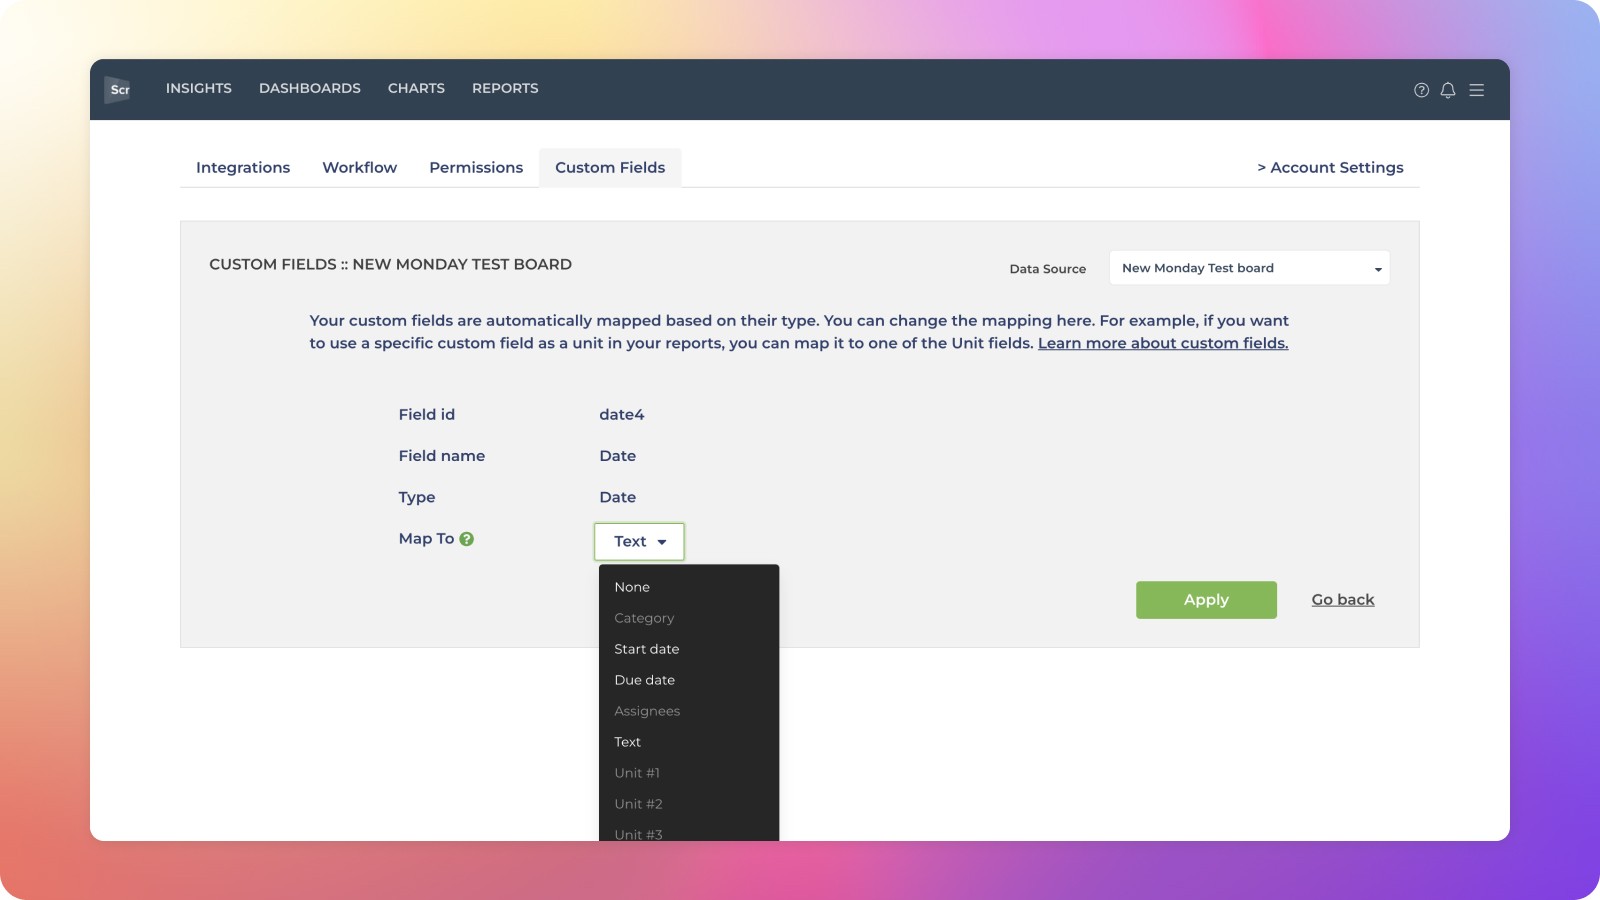
Since Timeline contains both start and end date, you can map it to either start date or a end date, and the other date is automatically mapped to the same Timeline field.
Once a custom field is mapped to either start date or a due date, the values of that field are used in constructing the Workload (planned) chart. Likewise, if you use start date or due date as a filter in your charts, it will be applied to your custom date field.
Disabling a custom field
In the case you no longer want to have a custom field visible, you can disable it by mapping it to None.
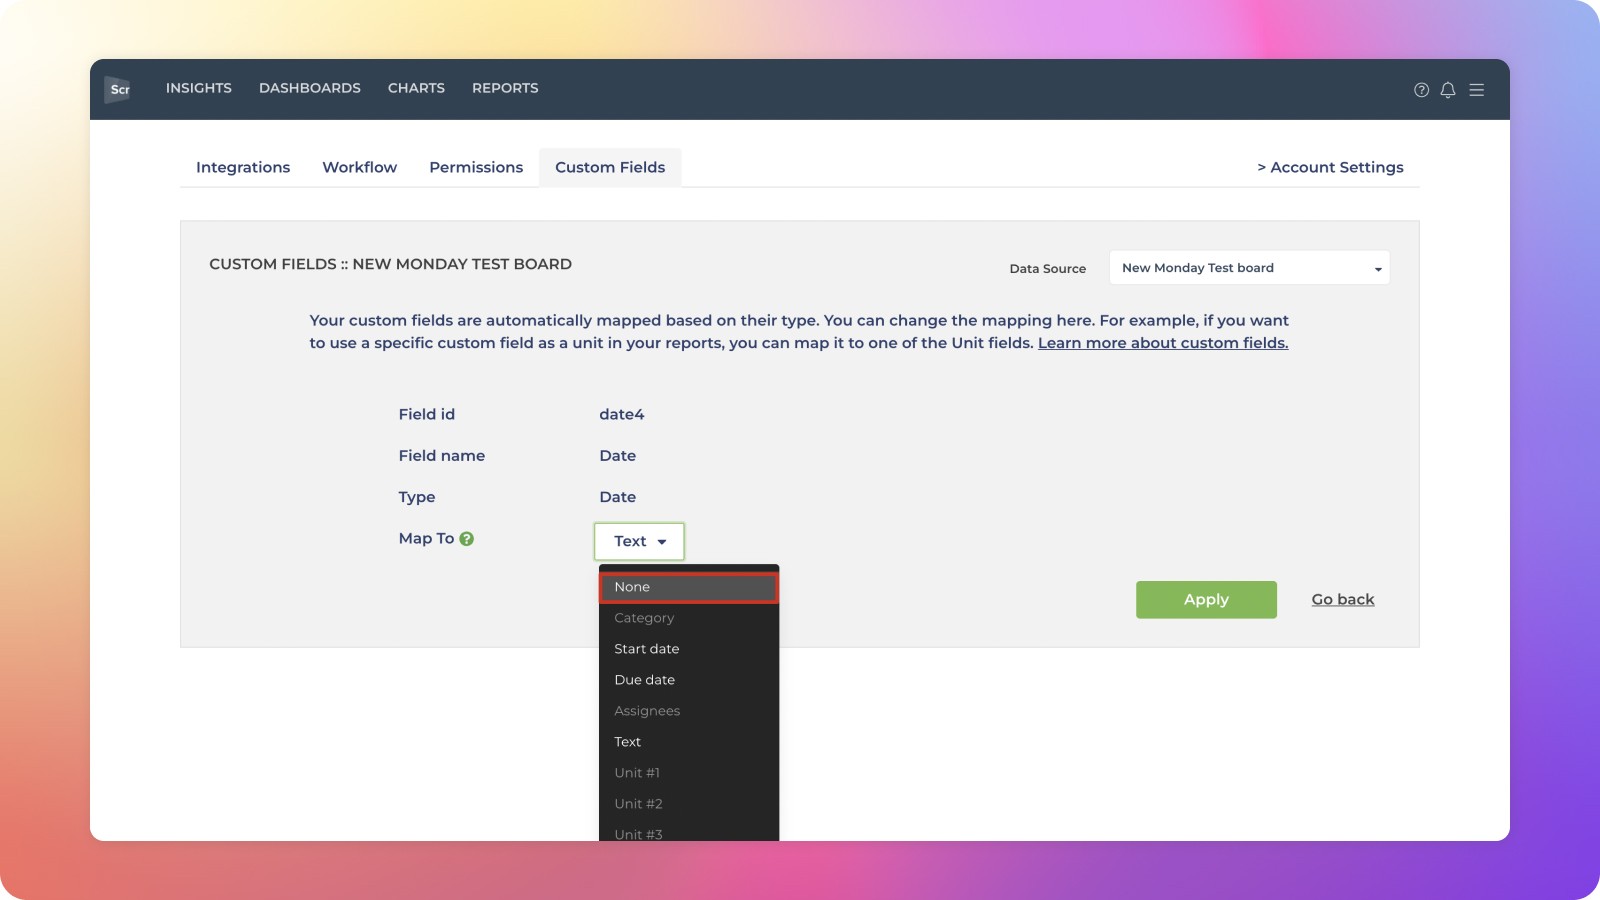
Once a field is disabled, it will no longer be imported into Screenful.