Guide contents:
Adding dates to Asana tasks
To add a start date
Click on the Due Date field within the task.
Click on or type in the due date.
Click on or type in your desired start date to the left of the due date.

Notice that there may be some delay before the dates become visible in the Screenful. Once you have set the dates, they will be reflected in the chart after the next data sync which is run automatically once per hour. You can trigger the sync manually any time by selecting the Data sync options from the main menu.
Configuring the Workload chart
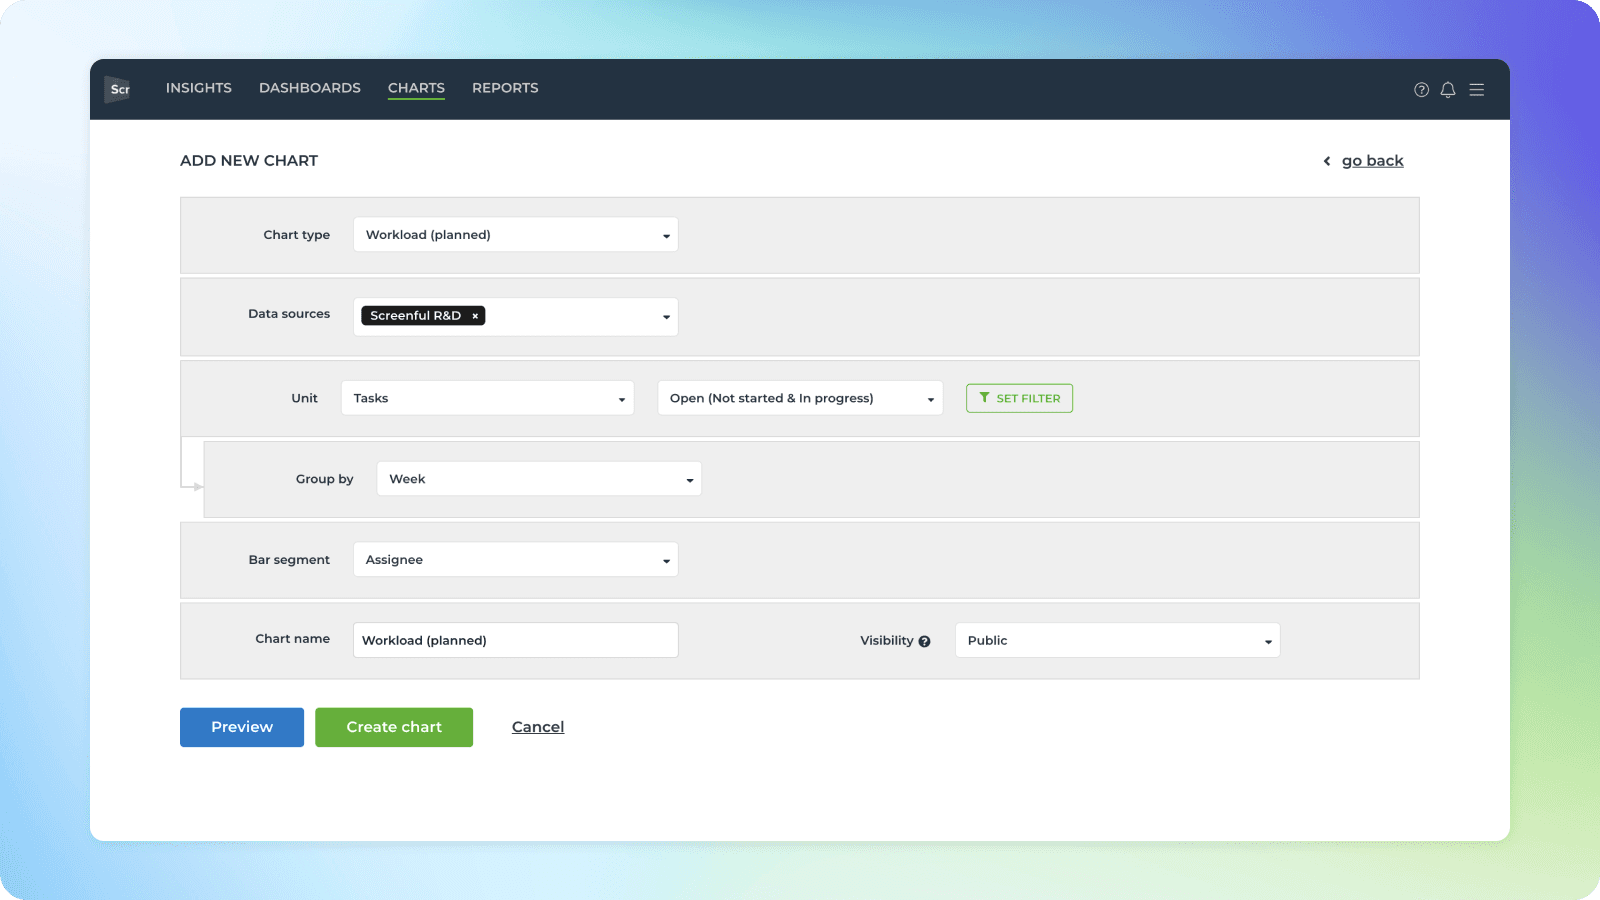
To create a Workload chart, go to the Charts tab and click Add new chart.
A modal is opened with a set of chart templates. Select New blank chart to open the chart editor. Select Workload as the chart type. In this example, we’ve selected grouping to be by Week, and bar segment to be Assignee.
That produces the chart seen at the beginning of this guide:
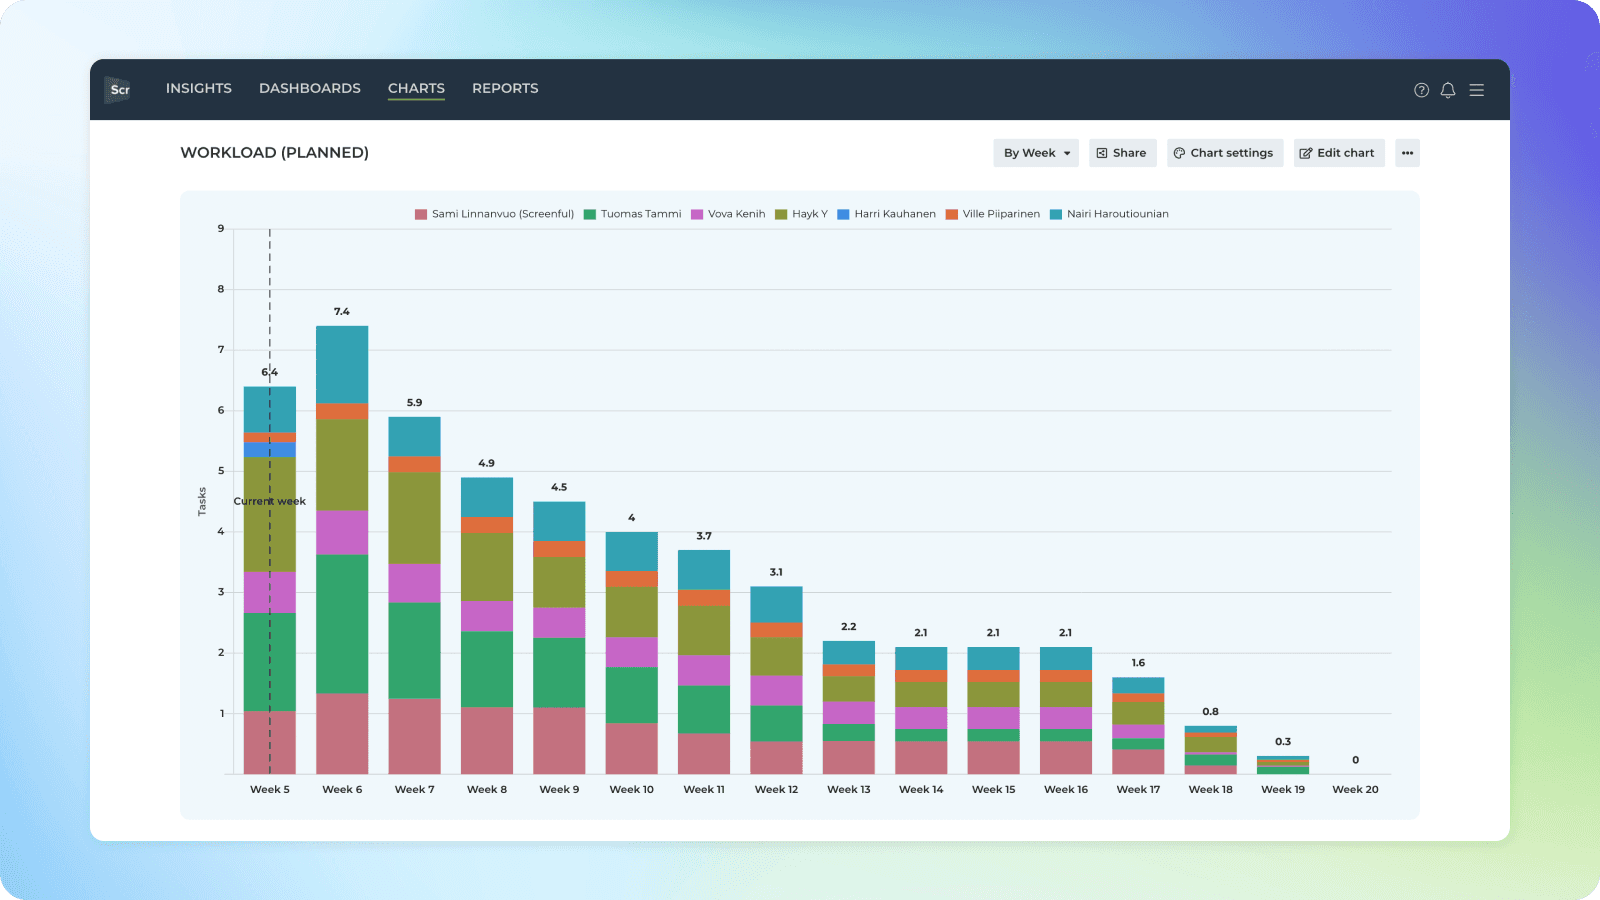
Notice that you can use any of your custom fields as the unit. By default, the chart uses Tasks, as the unit but you can change it to any of your custom fields from the unit menu. So for example, if you have set work estimates to your cards (e.g. as Story points), you can configure the chart to use those.